Fix light and framing before replacing the camera. Use your phone to test what you already own, choose a webcam for everyday convenience, and build a dedicated camera rig only when a specific recording need justifies its full cost and complexity.
Will a new camera improve your video, or would better lighting solve the problem first?
A camera upgrade makes sense when you can name what the existing one cannot do. Before shopping, clean the lens, put it near eye level, turn toward a window or place a diffused light slightly to one side, and remove a bright window from behind you. Disable beauty filters and background effects for the comparison.
The no-purchase test
Record the same 30-second introduction twice with your current camera: once as usual, then with better light placement. Keep framing, app, resolution and frame rate the same. If your face becomes clear and movement looks acceptable, work on repeatable lighting first. If focus, framing, reliability or usable detail still fails, choose the least complicated camera path that fixes that failure.
Set up the light with our lighting guide| What you see | Try first | When a camera change helps |
|---|---|---|
| Grainy face or smeared movement | Add useful light to your face; check exposure and filters. | The image still lacks useful detail in good light. |
| Dark face, bright background | Change position or control the window; expose for your face. | You genuinely need to retain a wider brightness range. |
| Sharp locally, soft on calls | Compare the receiving end, connection and app settings. | The camera is confirmed as the bottleneck; buying 4K alone is not a diagnosis. |
| Awkward angle or too much room visible | Move the camera, adjust its field of view or crop modestly. | The mount or lens cannot frame the shot at your available distance. |
| Objects stay blurry | Check minimum focus distance and move the object back. | You need closer focusing or a separate overhead view. |
Choose for the content you make
| Your job | Start here | Spend only when… |
|---|---|---|
| Calls and client consultations | Existing camera + better light. A simple USB webcam if setup needs to stay ready. | Your current camera cannot frame or focus on you clearly in good light. |
| Recorded lessons, YouTube or vertical clips | Record directly on your phone, transfer the file, then edit. No webcam app or capture card is required. | Repeated recording limits, lens restrictions or workflow friction interrupt production. |
| Live desk teaching and product demos | Face webcam + phone overhead. Show the work full-screen when detail matters. | The second angle cannot resolve the smallest label or action your audience must see. |
| Moving presentations | A tracking webcam, with its framing boundaries configured. | You leave a fixed frame often enough to justify tracking. Disable it for a stationary demonstration. |
| Frequent polished talking-head recordings | A camera-and-lens kit after the lighting test. | You can show a useful improvement in the exported video and keep the full system ready. |
Three complete starting setups
These configurations are assembled from documented interfaces and requirements, not hands-on tested kits. Planning allowances below are editorial estimates in USD as of September 17, 2026, not current offers. They assume you own a computer, phone where specified, microphone and usable light; tax, delivery, paid apps and replacement computers are excluded.
Existing phone + SmallRig 4766 arm kit
Use: your phone, the 4766 arm/clamp/phone-holder kit, an existing compatible charger or data cable, one window or diffused light and your existing audio setup. Do not buy the separate 4382 holder as well: the 4766 kit already includes a phone clamp.
Plan: approximately $30–80 for support and cabling, excluding the phone, light, microphone and optional app subscription. The included holder is listed for 55–85 mm phone widths; measure with the case fitted. The arm’s listed recommended load is 600 g, and shorter extension reduces leverage. Plan a flat, sound clamp surface within its stated flat-surface opening; avoid fragile glass and hollow edges.
- Clamp beside the monitor for face video, or beside the work area for overhead. Keep the charging connector clear.
- For recorded content, use the phone camera app and transfer a test file before recording a long lesson. Choose landscape for horizontal lessons or portrait for vertical delivery.
- For live use, connect with Continuity Camera, Windows connected camera or Camo, select the phone feed in your app, then select your microphone separately.
- Run for your intended session duration with the planned power arrangement. Check heat, battery trend, focus and interruptions.
Upgrade trigger: the phone is needed for calls or prompts during production, or reconnecting it repeatedly delays your sessions.
Insta360 Link 2C Pro + existing microphone + one key light
Use: the Link 2C Pro standard package with its monitor mount and USB cable, a compatible computer, your existing microphone and the lighting setup you already proved. A separate desk arm is optional when the monitor puts the lens too high, low or far to one side.
Plan: approximately $200–300 for webcam and connection/mount contingencies, excluding audio and light. If you only need straightforward calls, compare the lower-cost Brio 100 before committing. The extra spend buys a different feature set; this guide does not claim a measured image-quality win.
- Start with the lens just above the display and roughly at eye level. Try 60–90 cm lens-to-face distance, then adjust framing to your room.
- Select 1080p30 for the first call test. Choose the webcam in the destination app and your existing microphone as its audio input.
- Disable automatic framing for a fixed teaching shot. Enable it only if it helps keep your normal movement in frame.
- For an overhead lesson, add the phone setup as a separate angle rather than assuming a tilted desk view resolves small work.
Upgrade trigger: you need a specific lens, closer detail or recorded image control that the webcam cannot deliver after lighting and settings are corrected.
Canon EOS R50 V + RF-S 14–30mm kit lens
Use: the R50 V lens kit, a load-rated tripod you already own or a suitable camera support, a charged LP-E17 battery, a compatible SD card for internal recording, and your existing microphone and light. Start at the lens’s wide end and 4K30 for local recording; assess the frame before selecting cropped high-frame-rate modes.
Plan: approximately $950–1,350 for camera/lens, support, memory and power/data contingencies. This excludes a new microphone/light and optional HDMI capture. Build your quote from the actual package contents.
- Mount the camera behind or beside the display; allow room for the open screen and cable plugs. Mark the lens position so you can reproduce it.
- For prerecorded work, record to SD on battery for a session within its tested runtime. Keep the original files and verify import into your editor.
- For a USB webcam path, choose Movie mode → Communication functions → Computer USB (UVC/UAC) streaming → OK, then connect the data cable. Select the camera in the computer app and set the streaming size.
- In the camera’s streaming settings, enable Power over USB when using a supporting connection. Canon specifies a USB-PD source with at least 5 V / 1.5 A for this function; the computer port must actually provide it. Watch battery level during a full-session rehearsal.
Long sessions without a suitable powered computer port: use clean HDMI to an optional capture device, leaving USB-C available for a manufacturer-compatible power supply. This adds a separate power adapter and a micro-HDMI-to-HDMI cable. Do not assume a charge-only cable or arbitrary USB hub supplies both high-speed video and adequate power.
Canon’s exact USB streaming procedure and power requirements
Upgrade trigger: change the lens only after you can identify the missing framing or depth-of-field capability. A faster lens is not required just to start recording.
01 · Use the phone you already own
Mount it before choosing an app
A short desk stand is easy to move but consumes surface area. A clamp arm frees space but can transmit keyboard vibrations. A monitor mount works only if it fits the display and supports the phone without tipping or straining the screen. Check the holder against your phone, case and orientation; leave the camera lenses and charging port clear. Use a rated, secured support for an overhead teaching view.
Frame with the rear camera
Start with the main rear camera in landscape for calls and horizontal lessons, or portrait for vertical recordings. Preview on the computer, leave a little headroom and keep the lens near eye level. Avoid the ultra-wide lens just to compensate for an awkward mount: very close camera positions can exaggerate facial perspective. Move back where possible, then reframe. Lock focus and exposure if the app supports it and you remain in one place.
Apple Continuity Camera
Apple specifies iPhone XR or later with iOS 16 or later and a Mac with macOS Ventura 13 or later. Both use the same Apple Account with two-factor authentication. Wireless use requires Wi-Fi and Bluetooth; USB use requires trusting the Mac. Mount the phone, then select it as the camera in the calling app. Some effects have newer hardware requirements.
Check Apple’s full requirementsWindows connected camera
Microsoft offers a connected-camera feature for supported Android phones and Windows 11 PCs. Link the device, then look under Settings → Bluetooth & devices → Mobile devices → Manage devices and enable its camera. Check Microsoft’s current Android and Link to Windows requirements before buying a mount for this workflow.
Check Microsoft’s setup instructionsCamo
Camo Camera sends an iOS or Android phone’s video to Camo Studio on Windows or Mac, over a supported wired or wireless connection. Install both parts and select Camo in the destination app. Test the free offering first; check which controls and output modes need a paid plan. Workplace restrictions may prevent installing or selecting a virtual camera.
Check Camo compatibility and plansPlan power, interruptions and heat
Use a data-capable cable for a wired video connection; a charging-only cable is insufficient. Route it with enough slack that a chair or hand cannot pull the phone off its mount. Enable an appropriate Focus or Do Not Disturb mode and test what happens if a call arrives. Start charged, keep ventilation clear and run a full-length rehearsal while powered. Charging does not guarantee that the battery holds steady or that heat will not interrupt video.
Keep this path if: reconnecting is easy, the mount is stable and the phone lasts through your real sessions. For a prerecorded lesson, recording directly on the phone and transferring the file can be simpler than turning it into a live webcam.
02 · Choose a webcam for the job
For everyday calls, start at 1080p30. Buy 4K for useful recording detail or crop room, not an assumption that your calling service transmits 4K. Choose tracking only when you actually leave a fixed frame.
Research-led shortlist: documented features, not a measured image-quality ranking. Check the exact generation, connector, software support and package contents.
| Model | Choose it for | Tradeoff and buying link |
|---|---|---|
Logitech Brio 100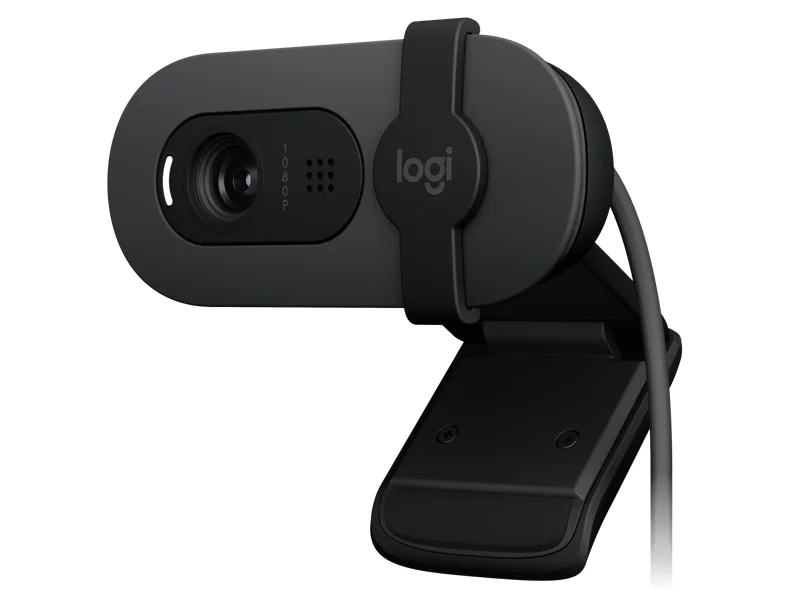 | Basic 1080p calls, a privacy shutter and a built-in mic. | A simple call camera, not a close-focus demonstration tool. The checked listing showed buying-options only; compare offers carefully. Check Amazon options (affiliate link) |
Logitech MX Brio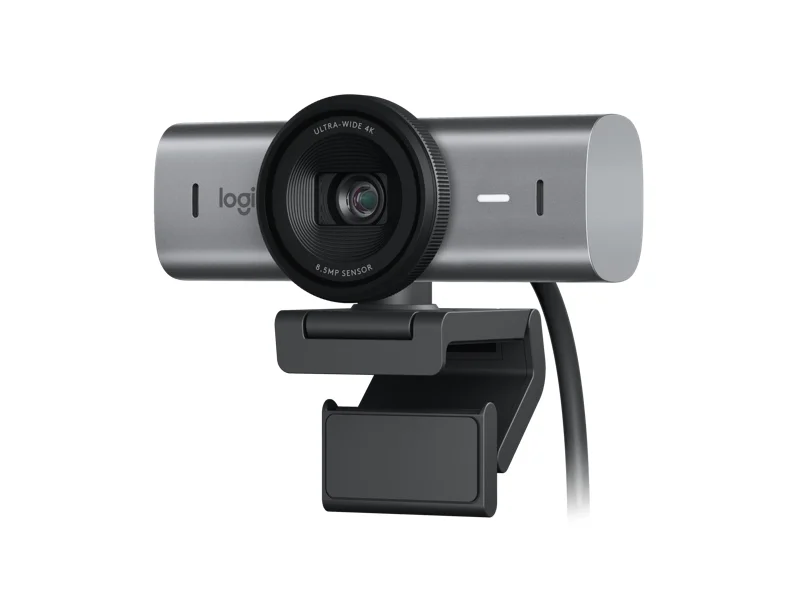 | 4K30 or 1080p60, plus a tilting Show Mode for a quick desk explanation. | An angled desk view does not replace a true overhead view of small components. Check Amazon options (affiliate link) |
Insta360 Link 2C Pro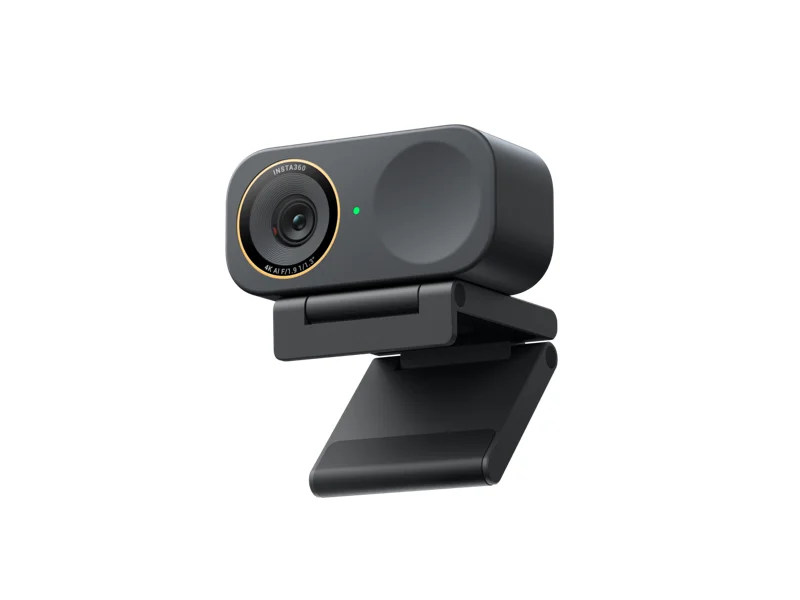 | A fixed-position desk setup with automatic framing and a 1/1.3-inch sensor. | Digital framing is different from a physically moving gimbal. Disable reframing for a stable demonstration. Check Amazon options (affiliate link) |
Insta360 Link 2 Pro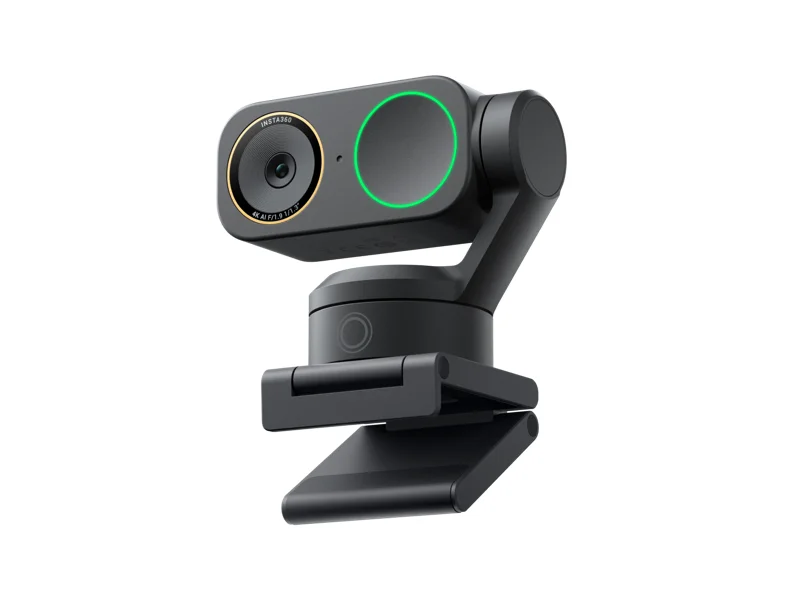 | A presentation where you move and want motorized tracking. | Tracking can distract during stationary lessons; check room boundaries and software controls. Check Amazon options (affiliate link) |
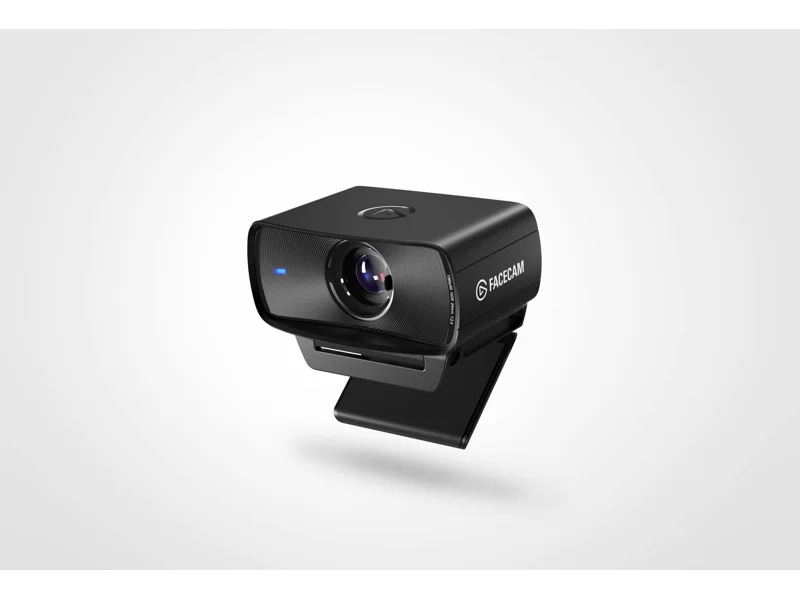
Fixed-focus alternative: the Elgato Facecam MK.2 offers 1080p60 and a stated 30–120 cm focus range. It avoids focus hunting within that range, but objects held very close may blur. It has no microphone and requires a suitable USB connection. Verify the exact MK.2 listing rather than substituting the original Facecam. Check Amazon options (affiliate link)
Before ordering, measure lens-to-face distance and test the proposed lens height. Keep the lens clear of the display bezel. Start with a direct compatible USB port; shared hubs can add bandwidth and power constraints.
03 · Build a dedicated camera setup when the shot earns it
A dedicated camera becomes worthwhile when you record often, need an interchangeable lens, require reliable focus on demonstrations, or want more control over depth of field and the final image. A blurred background alone is a weak reason to buy an entire rig in a room where you sit against the wall.
Choose the lens for the space
Measure from the proposed camera position to your face and mark the required frame before buying. Account for any crop in the selected video mode. A lens that is too tight can force the camera into a walkway; an extremely wide view can reveal more room than you want. Start with a compatible kit zoom when it covers the shot. A very wide aperture can blur your hands or an object even while your eyes are sharp; depth of field is a working choice, not a quality score.
Two ways to reach the computer
Direct USB: camera + lens → supported USB streaming mode → compatible data cable and computer port → recording or calling app.
HDMI capture: camera + lens → clean HDMI output → correct HDMI cable → compatible capture device → USB port → app.
Clean HDMI means a video output without camera menus and focus boxes. Confirm the actual camera output mode, capture resolution and frame rate together; a capture device’s “4K input” does not necessarily mean 4K capture. A normal laptop HDMI socket is generally an output, so it does not replace a capture device.
Sony ZV-E10 II + 16–50mm lens kit
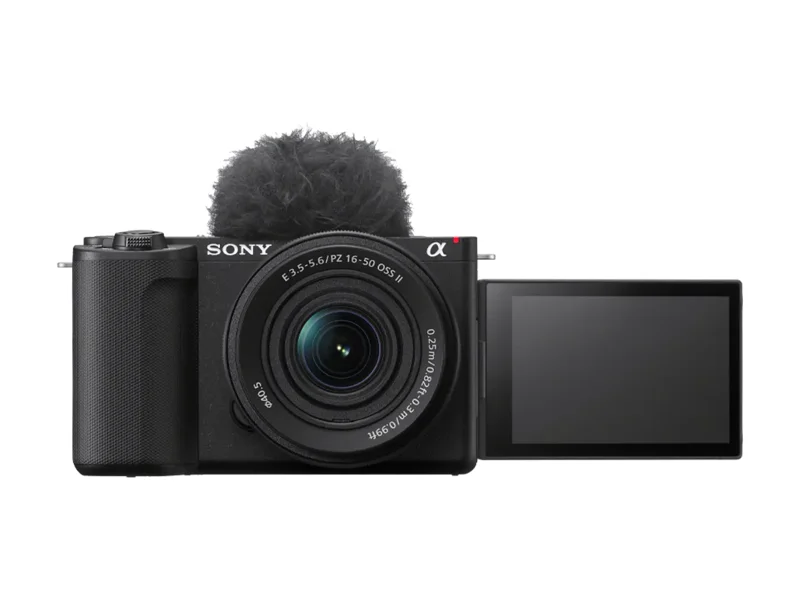
This interchangeable-lens camera supports direct USB streaming. Sony specifies SuperSpeed USB 5 Gbps for 4K or 1080p streaming; a USB 2.0 connection reduces actual output to 720p. Sony also warns that temperature and settings can shorten streaming time. This illustrates why the cable, port and session duration matter as much as the camera name.
Before buying: verify the exact lens bundle, framing at your desk distance, supported streaming mode and power arrangements. Do not transfer these specifications to the original ZV-E10, which is a different model.
Sony’s USB streaming instructions and limitationsCanon EOS R50 V + RF-S 14–30mm F4–6.3 IS STM PZ
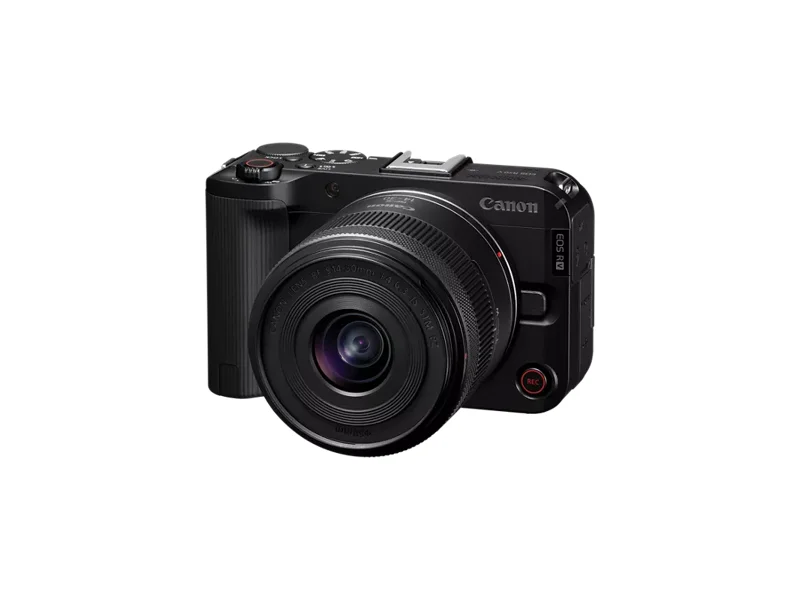
Consider this kit when you make frequent lessons and need a wide starting view plus lens choice. The complete setup above explains its direct USB path. Buy the lens kit, not a body-only listing or an accessory bundle with a different lens.
Tradeoff: lens, support, power and session testing remain your responsibility. Its recording modes can frame differently; check your intended mode at your desk distance.
Check Amazon options (affiliate link)Canon PowerShot V1
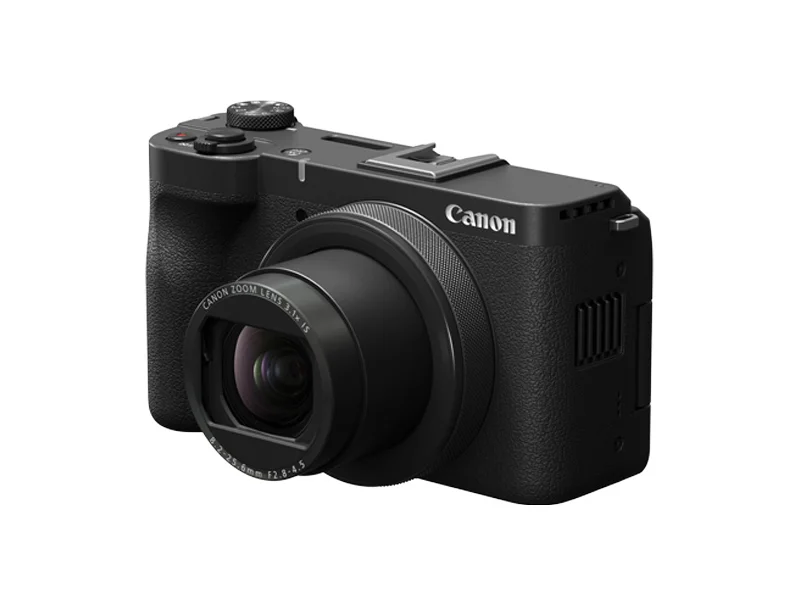
A fixed-lens alternative with an integrated wide zoom and cooling fan. Consider it when you want a dedicated recording camera but do not need interchangeable lenses.
Tradeoff: you cannot replace the lens later. The fan is not a promise of unlimited runtime; test power, heat, focus and your chosen computer connection for the full session.
Check Amazon options (affiliate link)Budget for a working system
Compare body + lens + load-rated support + appropriate continuous power + cables + optional capture device + audio + any necessary lighting. Include tax, delivery and software fees in your own quote. A battery, memory card or power adapter may be separate. Follow the camera manufacturer’s power guidance and verify whether a battery must remain installed; USB power does not promise unlimited runtime.
Small-workspace check: allow space for the opened screen, cable plugs, lens, ventilation and access to controls. Confirm the arm’s rating for the combined load at the intended extension. A rig that blocks the display or must be rebuilt for every meeting may lose to a webcam despite its image potential.
Choose this path only if: the better shot is visible in your actual finished video, the complete cost is justified by frequent use, and a full-session rehearsal proves the system stable.
Buy only the support your setup needs
Amazon listing identities and available offers were checked September 17, 2026. Seller, condition, price and package contents can change. These links use Maker Signal’s affiliate tag; inclusion is based on the role each product fills.
SmallRig 4766: complete phone arm kit
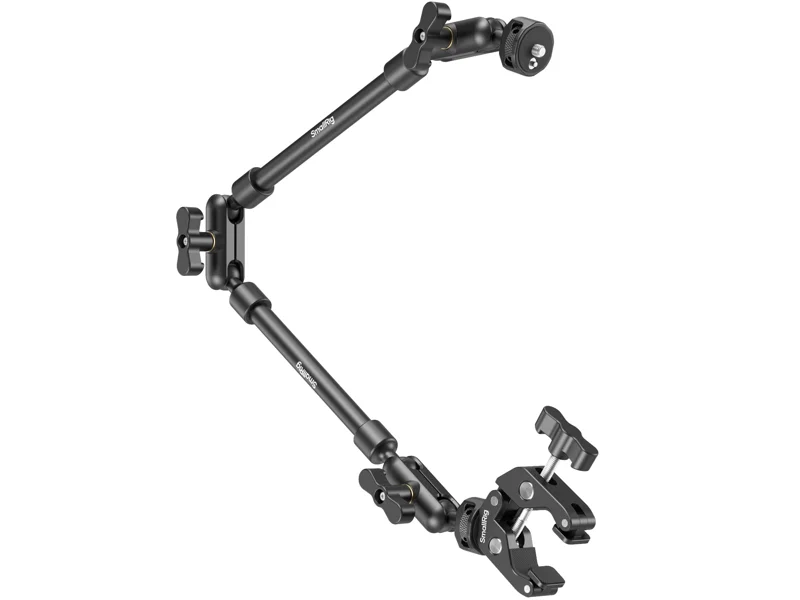
Includes the arm, desk clamp and phone holder. The listed phone width is 55–85 mm and recommended load is 600 g. Measure your phone with its case. Use a short extension where possible and check clamp fit before purchasing.
Check Amazon options (affiliate link)SmallRig 4382: holder for a support you already own
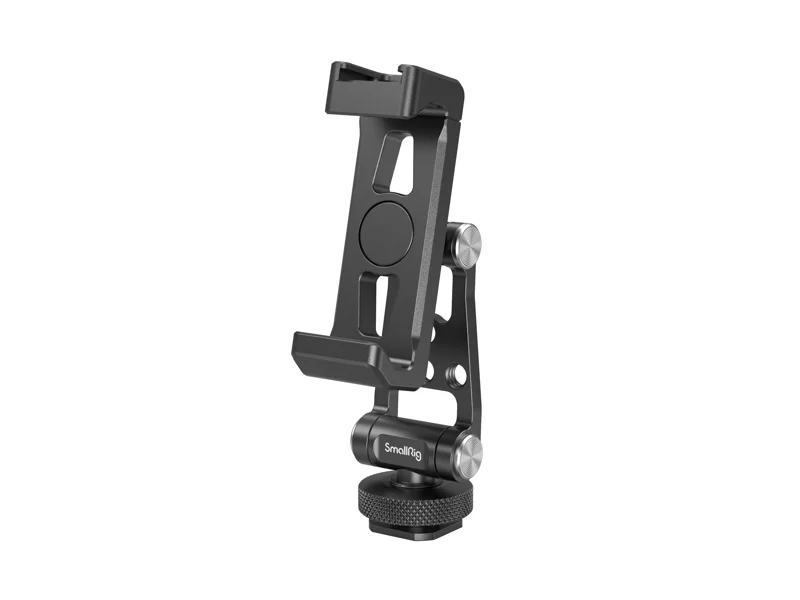
A 57–88 mm phone holder with a 1/4-inch mounting connection. This is a holder, not a complete desk stand. Skip it if buying the 4766 kit, which already includes a phone clamp.
Check Amazon options (affiliate link)Belkin MagSafe mount for Mac desktops and displays
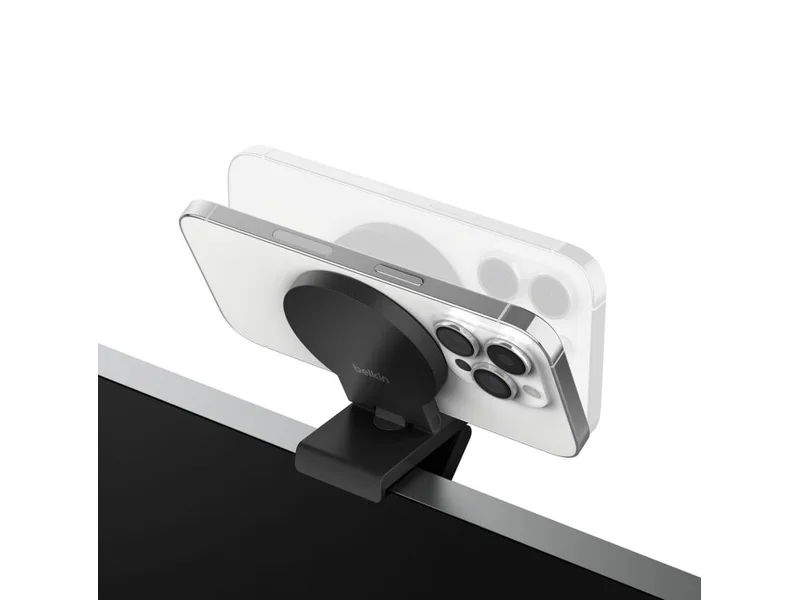
For a compatible iPhone/case and display running Continuity Camera. Check monitor fit; this is the desktop/display model, not the laptop version, and it is not a charger. The offer inspected was used, not new.
Check Amazon options (affiliate link)Elgato Cam Link 4K: optional HDMI capture
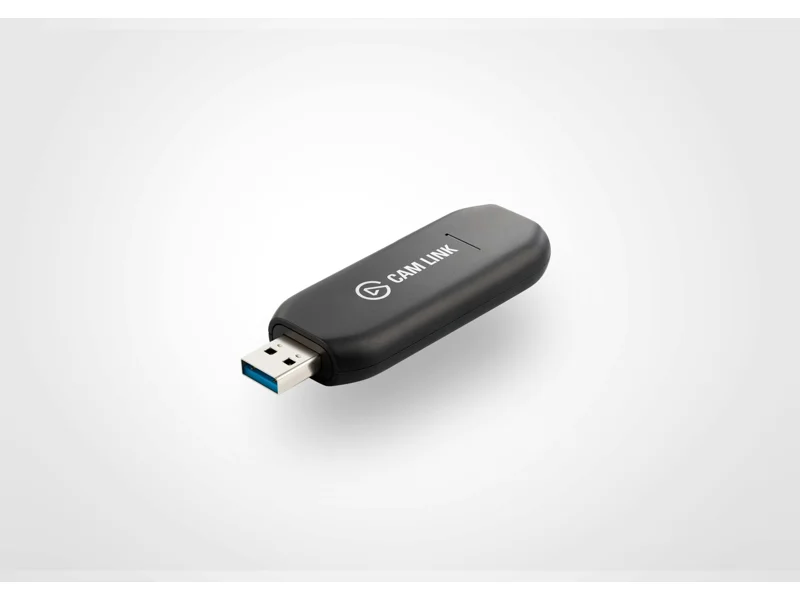
Use only if your camera’s direct USB path does not meet the need. Connect clean, unencrypted HDMI through the correct cable to the capture device, then a USB 3.0 port. Start at 1080p60 where the camera supports it. The current listing advertises 4K60 only with compatible cameras and the latest hardware; do not assume an older used unit has that capability.
The listed box includes a USB extension, not your camera’s HDMI cable. For the R50 V, budget separately for micro-HDMI to HDMI and suitable continuous power. Check Elgato’s specifications.
Check Amazon options (affiliate link)Dedicated-camera support: begin with a tripod you already own if it holds the camera and lens securely at the required height. For a desk clamp, compare its rated load at extension with the combined camera, lens and cable load, and verify your desk edge. A phone arm is not automatically suitable for a camera body.
Show hands and products without fighting the camera
- Mark the work area. Start with a roughly 30 × 40 cm (12 × 16 in) area using removable tape. This is an illustrative working area, not a tested field of view.
- Put the lens above its center. Use the phone’s main rear camera and adjust height until all four corners are visible. Keep the support out of the hand path; secure the cable separately so it cannot pull on the holder.
- Light from the side. Move the light until your normal hand movements stop hiding the important step. Turn glossy packaging slightly to move reflections off the label.
- Use a realistic focus target. Place the smallest text or component you actually teach with at working height. Focus there, record it, then review at the size viewers will see. Move a tiny item to a separate close-up position if needed.
- Check orientation. Record a card reading “LEFT / RIGHT.” Your self-preview may be mirrored while the delivered image is not. Correct the output only after checking the recording or receiving screen.
A simple two-angle OBS workflow
Create a “Face” scene with your webcam and a “Desk” scene with the phone feed. Add each through the appropriate video capture source for your operating system and select the device. Add your chosen microphone once, using one consistent audio route. If using a scene-specific audio source, do not also capture that same microphone globally.
Use a direct cut and keyboard shortcuts to switch scenes. Enlarge the desk view for precise work; a small picture-in-picture box can make the demonstration unreadable. For recorded lessons, recording the phone’s overhead footage locally and editing it with your face recording is another option. Clap at the start and check synchronization at both ends of a long recording.
OBS scene and source instructions · Avoid duplicate microphone capture
Starting settings you can actually use
These are editorial starting points, not model-specific presets. Start in SDR with a normal color profile; leave log recording and HDR delivery off until your editor and delivery workflow support them. Use the same frame rate in camera, capture software and export where practical.
| Use | Resolution / rate | Focus and exposure |
|---|---|---|
| Everyday calls | 1080p / 30 fps where supported. Let the calling service negotiate delivery. | Face autofocus and auto exposure first. Add light before raising gain. Lock white balance if the light is stable. |
| Recorded talking head | 4K / 30 fps if you need crop room and can edit it; otherwise 1080p / 30. | Eye/face autofocus for movement. Under steady light, set exposure and white balance so the picture does not change when a hand enters frame. |
| Hands and demonstrations | 1080p / 60 fps for motion, or 4K / 30 for small detail. Verify the finished output. | Focus on the work plane and lock it when object height is constant. Use autofocus for changing distances, then rehearse transitions. |
Manual shutter: in a 60 Hz lighting environment, try 1/60 second at 30 fps or 1/120 at 60 fps. In a 50 Hz environment, try 25 fps with 1/50 or 50 fps with 1/100. These are starting points: LED dimming can still cause bands. Test the actual light at its intended brightness. A faster shutter can reveal fast hand movements more clearly, at the cost of light and a sharper motion look.
Lens and aperture: begin near the wide end of a kit zoom, then frame at your real desk distance. If a hand or product falls out of focus, try a smaller aperture such as f/5.6 with more light. Do not open the lens solely for background blur when the work itself needs to stay sharp.
Fix the failure you can see
| Problem | Action | Watch for |
|---|---|---|
| Face is grainy or motion smears | Add light to the face, disable heavy background/beauty processing, and compare at 30 fps. | A higher-resolution camera will not correct an exposure that is too long for movement. |
| Focus jumps between face and product | Use product-priority focus if available, or a fixed demonstration position with focus locked. | A fixed-focus webcam cannot refocus on something held very close. |
| Image pulses or horizontal bands appear | Match anti-flicker frequency to local lighting; try the frame-rate/shutter starting points above and a different dimmer level. | Some LED drivers require a different light or setting. |
| Local preview is sharp; call is soft | Check a receiving screen, app HD settings and network stability; stop competing uploads. | Do not buy another camera until the limitation remains in a local recording. |
| Text is backwards | Check a recorded file or receiving screen before changing the source transform. | Self-view mirroring alone is not proof the audience sees reversed text. |
| Color shifts when a white object enters | Lock white balance under stable light; use a consistent background and exposure. | Mixed-color light cannot be fixed by one white-balance setting. |
| Sound precedes the visible clap | In OBS Advanced Audio Properties, add a measured positive Sync Offset to the microphone, then record again. | Three frames at 30 fps is about 100 ms. This is an example, not a universal setting. |
| Sync drifts during a long session | Check at start and end, align sample rates where supported, then simplify the connection path. | A constant offset cannot fix a delay that keeps changing. |
| Camera disconnects or loses power | Use a known-good data cable and direct compatible port, close competing camera apps and inspect heat/power behavior. | A USB-C connector does not guarantee the required speed or power. |
Make a comparison worth trusting
Evidence status: this is a research-led guide. Manufacturer documentation establishes listed features; Amazon checks establish listing identity and observed purchase options. Maker Signal has not completed a controlled camera comparison or endurance test. The layouts are illustrative, and no generated image represents camera performance.
Current camera, current light.
Same camera, framing and output settings; better light placement.
Candidate camera, the improved light and a matching frame.
Record the same short script, head turn, hand movement and printed label in each clip. Keep the microphone unchanged. Note whether exposure is automatic; for a manual comparison, match shutter and white balance where supported and adjust exposure for a comparable face brightness. Keep original files and compare both the local recording and delivered call.
Judge readable detail, focus transitions, highlights, skin color, movement, audio sync and restart reliability. If B solves the problem, improve the repeatability of your lighting. If C helps only when pixel-peeping a paused frame, consider whether the audience benefits.
Save your repeatable video setup
Record the working positions, settings, connections and full-session results on one sheet.
Download the video setup card (PDF)One page · US Letter · Use “Fit” for A4 printing.
Prove the setup in the app your audience sees
- Check the receiving end. A local preview can look better than the delivered call. Ask a test participant to check text, skin detail, motion and framing.
- Select audio separately. Confirm the microphone after changing cameras. Record a hand clap and check lip sync; an HDMI or phone path can introduce a different delay from your USB microphone.
- Test the full duration. Run at the planned resolution and power arrangement for your longest normal session plus margin. Watch battery level, heat, dropped frames, focus and reconnect behavior.
- Rebuild it tomorrow. Time setup. Save mount height, camera distance, lens or field of view, exposure, white balance, resolution, frame rate, light position and audio input.
Stop upgrading when: your audience can clearly see your face or work, motion and sound remain in sync, and starting the next session is easy.
Complete the setup with the microphone guide, lighting guide and small-workspace desk guide.
Research behind this guide
Apple — Continuity Camera requirements and setupMicrosoft — Android connected cameraCamo — phone and desktop compatibilityLogitech — Brio 100Logitech — MX Brio specificationsElgato — Facecam MK.2 specificationsSony — ZV-E10 II USB streaming and limitationsInsta360 — Link 2 Pro and Link 2C ProCanon — R50 V lens kitCanon — R50 V USB streaming and powerCanon — PowerShot V1 supportSmallRig — 4766 arm kitSmallRig — 4382 phone holderBelkin — desktop MagSafe mountHow we’ll keep this guide current
Material changes to the cited guidance, prices, availability, or commercial terms will trigger a review before this page is republished.